HOWTO: Patient self-registration in the Native Patient Portal v6.1
Introduction
This document is an update of the Patient self-registration docs for OpenEMR Patient Portal v6.0. OpenEMR v6.1 contains enough significant updates in both the portal functionality and the EMR interface that it really does rate a separate document.
Configuration
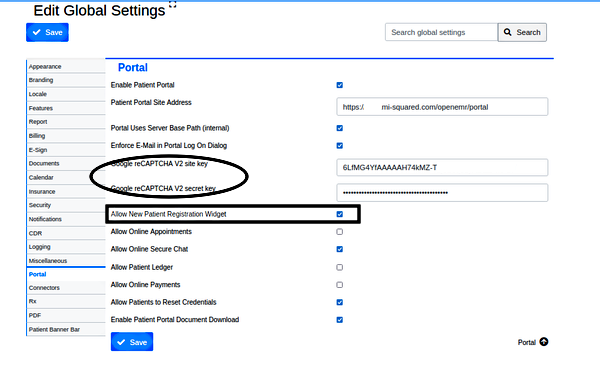
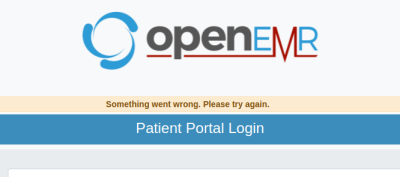
Most portal globals settings (main menu: Administration/ Globals, tab: Portal) may be configured as desired to suit your needs. However, a few of the global settings are necessary specifically to allow patient self- registration. And several of them if missing or mis-configured will generate a generic 'Something went wrong' message when a login or self- registration is attempted.
Be sure to get these right:
- Set Portal Globals to allow the self- registration: "Allow Onsite New Patient Registration' (rectangle, below)
- Note the two text areas for Google CAPTCHA V2 keys (oval). For v6.1 CAPTCHA verification is required for registration. See the wiki page HOWTO: Activate the Patient Portal v6.0+
- It is possible to use the portal without configuring SMTP to send email notifications of portal registrations and credential changes but you and the patients will see a lot of confusing error messages.
- Self- registering new patients may see an error when attempting to self- register: (to the effect of) 'Something went wrong, check with the clinic' (not pictured). Per the forum, the remedy is to deselect the global in Locale tab, “All Languages Allowed” and/ or select one particular language to be used.
Procedure
1. Portal Login Screen
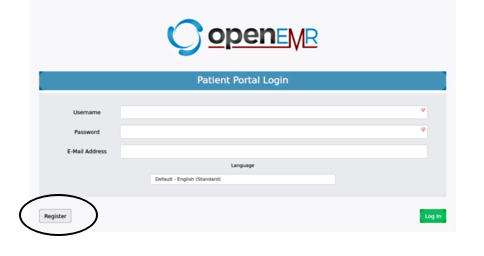
To self- register through the portal, the patient first obtains the practice's Patient Portal Login URL and surfs to it.
- Be sure the browser has not auto-filled any user names of passwords into the login form- delete them if present.
- Click the 'Register' button (oval at lower left).
2. 'Account Registration' screen.
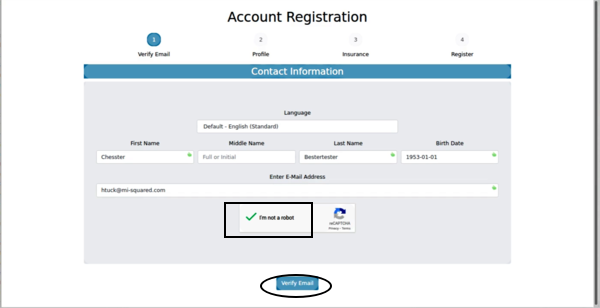
Fill in the required blanks (image below).

The little icon for required items (circle at right) will be used in other portal registration screens.
- Click in 'I'm not a robot' Captcha checkbox (rectangle)
- This email is also used as the patient's portal login so must not be the same as other patients in the practice's EMR
- NOTE: Multiple patients can share an email address and each have their own portal accounts but only the first one can self-register. Then the others' portal credentials must each be created in their separate EMR records with these steps: HOWTO_Activate_a_Patient's_portal_access_-_v6.0#2._Authorize_patient_in_OpenEMR
- Click 'Verify Email' (oval at bottom)
3. Email Verified
- See the message:
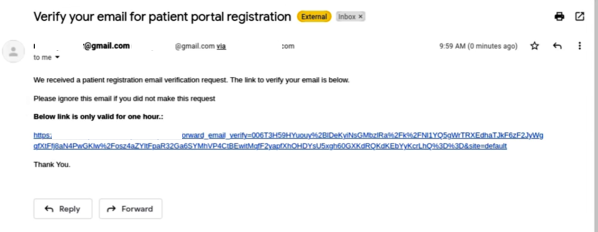
- Locate the email in your Inbox (or maybe Spam box)
- Open the email:
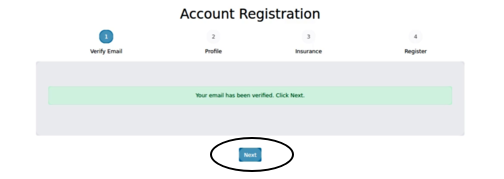
- Click the long blue link which will return you to the portal 'Account Registration' screens, with the message, 'Your email has been verified...
- Click 'Next' (oval below)
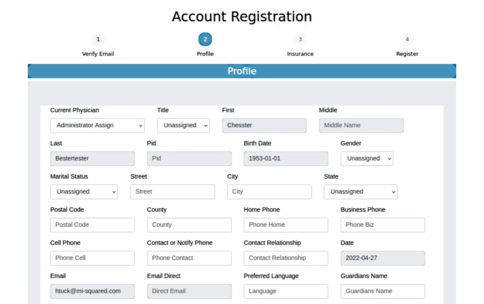
4. Fill in the patient profile information
Again, the required items have the little icon in the text area.
- Most of these data are not required for registration but anything entered now will not have to be entered later at the clinic.
- These fields are the demographics and history information that will be transferred to the new patient's OpenEMR record.
- If any required items are missed, when the 'Next' button is clicked this screen will return showing them with a red border.
- Scroll down and click 'Next' at bottom of screen (not shown)
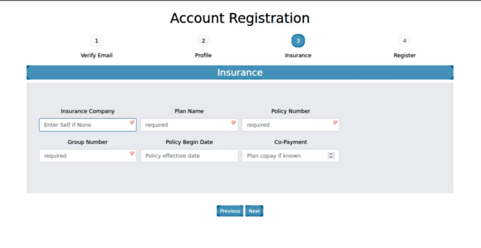
5. Enter insurance
- Enter 'Self' in 'Insurance Company' if patient has no insurance.
- Click 'Next' (or may click 'Previous' to return to change entries in first screen)
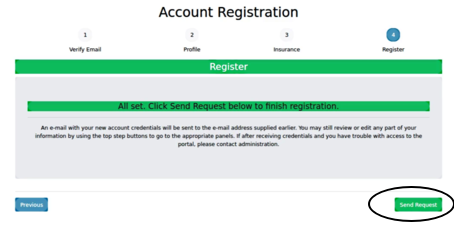
6. Registration Complete
- As the panel says, the user may use the step buttons along the top of the panel to return to an earlier section and change the information.
- Click green 'Send Request' button at lower right.
7. Registration Email Sent
- see the message:
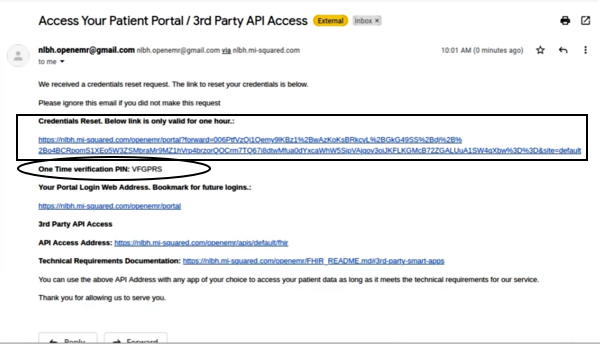
8. Portal Credential Reset
- Locate the Registration email:
- A credential reset will be required for the first portal login. Click the link in the rectangle below
- Note the One Time Verification PIN to be used in the next step (oval)
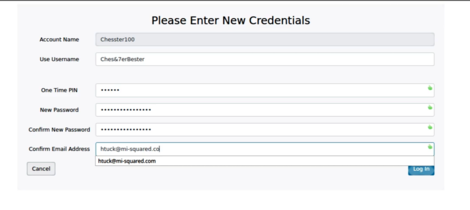
- In the linked screen enter new credentials:
- Create a new password of 12 - 80 characters
- enter the One Time Pin from email
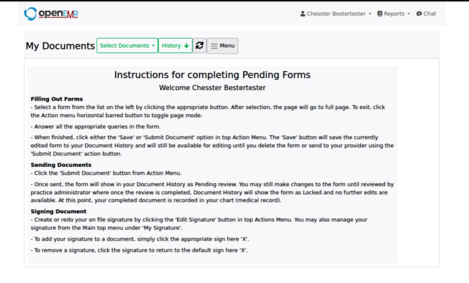
- ... and successfully login to the new portal account.
You might want to explore your new account, following the examples in:
Patient Use of the Patient Portal in OpenEMR v6.0+
Conclusion/ Notes
Here are some forum posts that might be useful reference.
- RE: the 'All languages allowed' setting:
https://community.open-emr.org/t/patient-portal-new-user-registration-something-went-wrong/18133/15
- Other peoples' experiences of the 'Something went wrong' error
https://community.open-emr.org/t/unable-to-login-to-patient-portal-in-6-10/18145
https://community.open-emr.org/t/patient-portal-new-user-registration-something-went-wrong/18133/13
