Difference between revisions of "OpenEMR 3.0 Linux Installation"
Bradymiller (talk | contribs) |
Bradymiller (talk | contribs) |
||
| (6 intermediate revisions by the same user not shown) | |||
| Line 32: | Line 32: | ||
'''7.''' Open up web-browser and point it to the installation script at: http://localhost/openemr/setup.php | '''7.''' Open up web-browser and point it to the installation script at: http://localhost/openemr/setup.php | ||
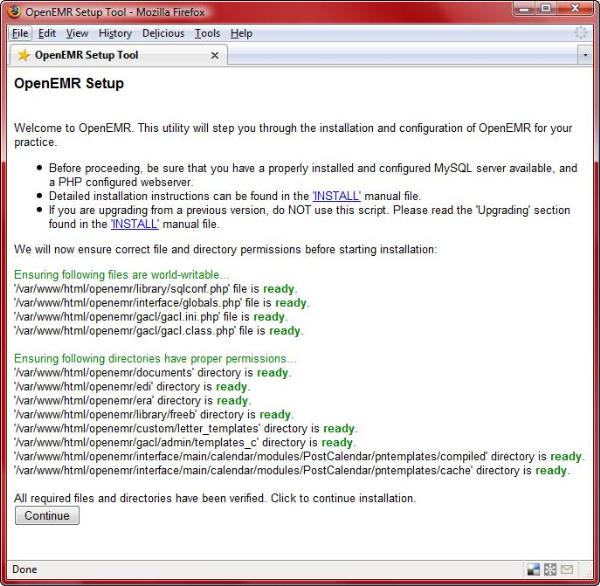
:The first screen gives some general instructions and ensures file and directory permissions are set up correctly. Read and follow the instructions carefully. If there are errors on this screen, then follow instructions to fix. (screenshot below) | :The first screen gives some general instructions and ensures file and directory permissions are set up correctly. Read and follow the instructions carefully. If there are errors on this screen, then follow instructions to fix. (screenshot below) | ||
[[File:Linux-Install-V30-1.jpg|link=]] | |||
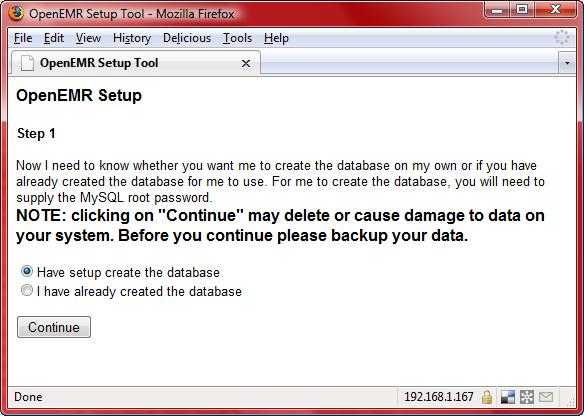
:Step 1 ask if you want OpenEMR to create the database. Read and follow the instructions carefully. (screenshot below) | :Step 1 ask if you want OpenEMR to create the database. Read and follow the instructions carefully. (screenshot below) | ||
[[File:Linux-Install-V30-2.jpg|link=]] | |||
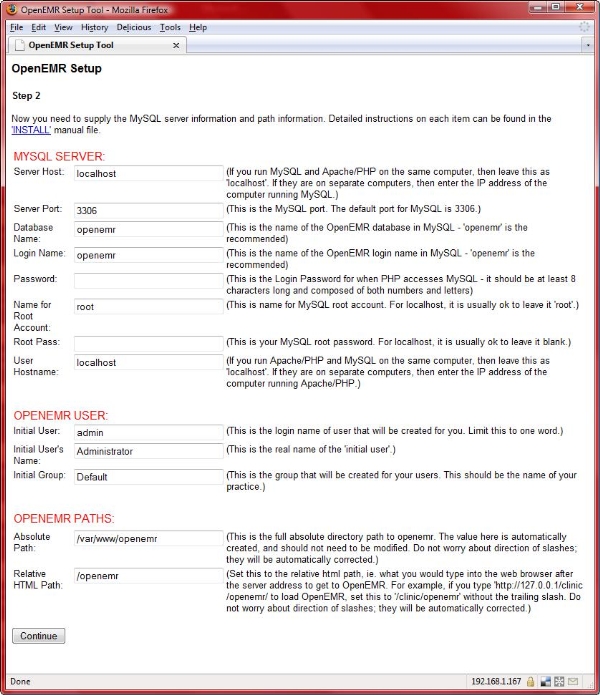
:Step 2 is where you input MySQL database information along with OpenEMR user and OpenEMR path information. Do not be intimidated by this form. Most users will just need to enter a "Password", however, read and follow the detailed instructions carefully. (screenshot below) | :Step 2 is where you input MySQL database information along with OpenEMR user and OpenEMR path information. Do not be intimidated by this form. Most users will just need to enter a "Password", however, read and follow the detailed instructions carefully. (screenshot below) | ||
[[File:Linux-Install-V30-3.jpg|link=]] | |||
:Step 3 configures OpenEMR. (screenshot below) | :Step 3 configures OpenEMR. (screenshot below) | ||
[[File:Linux-Install-V30-4.jpg|link=]] | |||
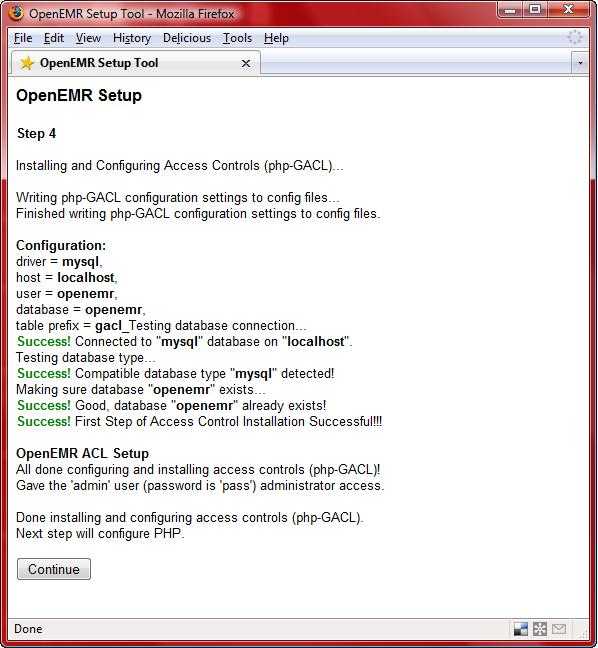
:Step 4 configures access controls (php-GACL). (screenshot below) | :Step 4 configures access controls (php-GACL). (screenshot below) | ||
[[File:Linux-Install-V30-5.jpg|link=]] | |||
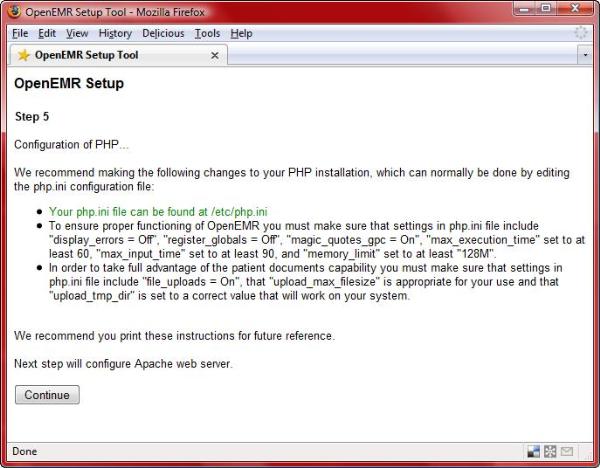
:Step 5 gives detailed instructions to configure PHP. Read and follow the instructions carefully. This information is personalized for your computer, so we suggest you print this screen for future reference. (screenshot below) | :Step 5 gives detailed instructions to configure PHP. Read and follow the instructions carefully. This information is personalized for your computer, so we suggest you print this screen for future reference. (screenshot below) | ||
[[File:Linux-Install-V30-6.jpg|link=]] | |||
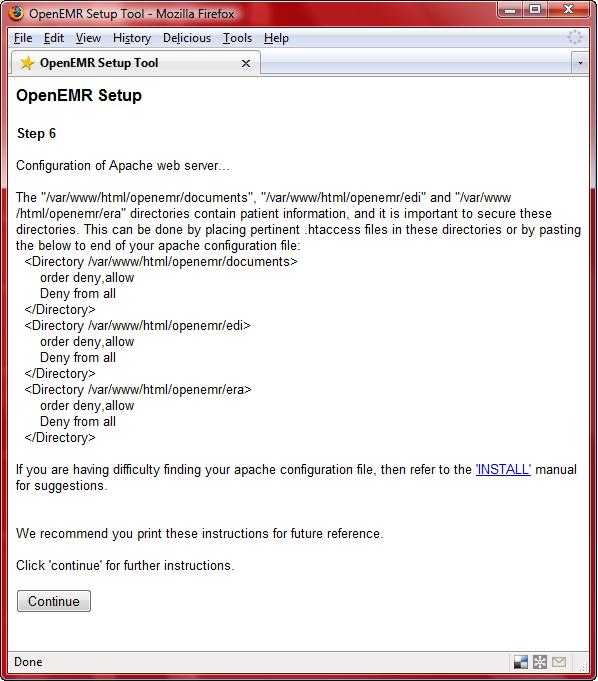
:Step 6 gives detailed instructions to configure Apache; it basically involves securing directories that will contain sensitive patient information. Read and follow the instructions carefully. This information is personalized for your computer, so we suggest you print this screen for future reference. (screenshot below) | :Step 6 gives detailed instructions to configure Apache; it basically involves securing directories that will contain sensitive patient information. Read and follow the instructions carefully. This information is personalized for your computer, so we suggest you print this screen for future reference. (screenshot below) | ||
[[File:Linux-Install-V30-7.jpg|link=]] | |||
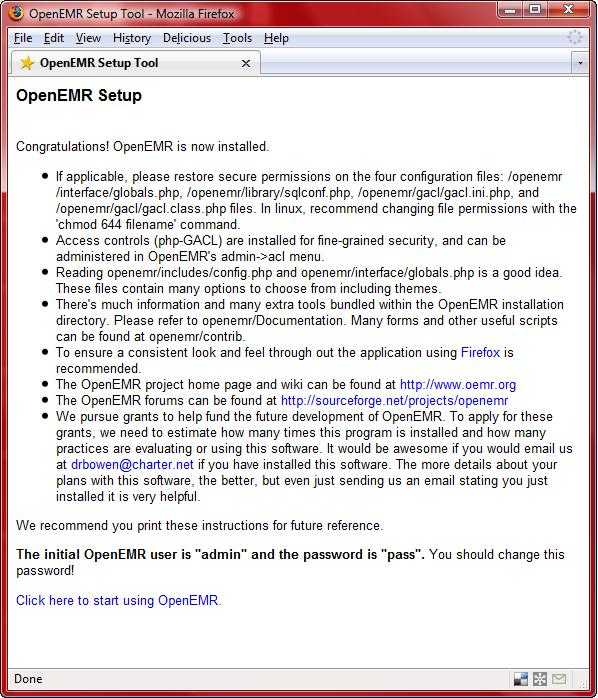
:The final installation screen gives additional instructions. This information is personalized for your computer, so we suggest you print this screen for future reference. At the bottom of the page is your OpenEMR username and password, along with a link to OpenEMR. (screenshot below) | :The final installation screen gives additional instructions. This information is personalized for your computer, so we suggest you print this screen for future reference. At the bottom of the page is your OpenEMR username and password, along with a link to OpenEMR. (screenshot below) | ||
[[File:Linux-Install-V30-8.jpg|link=]] | |||
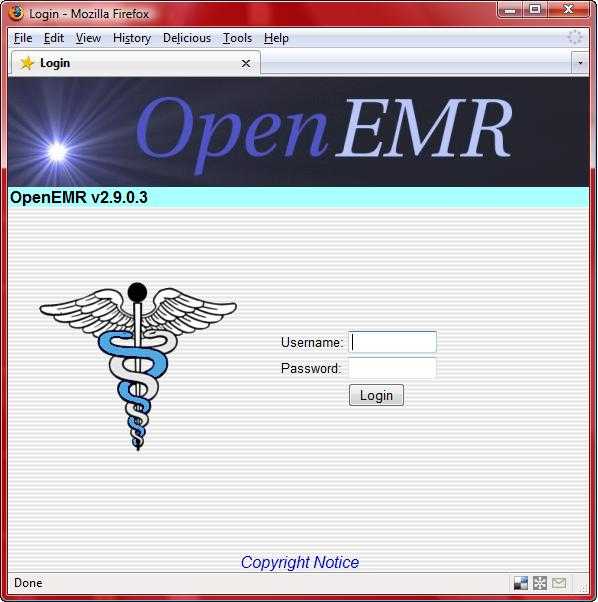
:Below is a screenshot of OpenEMR after installation. (screenshot below) | :Below is a screenshot of OpenEMR after installation. (screenshot below) | ||
[[File:Linux-Install-V30-9.jpg|link=]] | |||
| Line 87: | Line 87: | ||
Support:<br> | Support:<br> | ||
http://sourceforge.net/projects/openemr/forums | http://sourceforge.net/projects/openemr/forums | ||
[[Category:Installation]][[Category:Linux Package]] | |||
Latest revision as of 22:22, 23 April 2012
1. Install and configure MySQL, Apache (or another PHP-capable webserver), and PHP5 (PHP4 is also supported). We recommend referring to your specific operating system (OS) documentation for installation of these software packages.
2. Download OpenEMR from sourceforge: http://sourceforge.net/project/showfiles.php?group_id=60081&package_id=146729
3. Extract the downloaded archive:
- tar -pxvzf openemr-|version|.tar.gz
4. Move the extracted directory openemr-|version| to your webserver root directory, and then go to this directory. Refer to your OS and webserver documentation to obtain you webserver root directory. For example, Mandriva's webserver root directory is /var/www/html, so in mandriva you would use the following commands:
- mv openemr-|version| /var/www/html/openemr
- cd /var/www/html
5. Modify file permissions (this should be done as root user):
- chmod 666 openemr/library/sqlconf.php
- chmod 666 openemr/interface/globals.php
- chmod 666 openemr/gacl/gacl.ini.php
- chmod 666 openemr/gacl/gacl.class.php
6. Modify directory permissions. We need to make the following directories writable by the webserver username. The webserver username is dependent on your OS; "apache", "www-data", and "nobody" are some common examples. Mandriva's webserver username is "apache", so in mandriva you would use the following commands (this should be done as root user):
- chown -R apache:apache openemr/documents
- chown -R apache:apache openemr/edi
- chown -R apache:apache openemr/era
- chown -R apache:apache openemr/custom/letter_templates
- chown -R apache:apache openemr/library/freeb
- chown -R apache:apache openemr/gacl/admin/templates_c
- chown -R apache:apache openemr/interface/main/calendar/modules/PostCalendar/pntemplates/cache
- chown -R apache:apache openemr/interface/main/calendar/modules/PostCalendar/pntemplates/compiled
7. Open up web-browser and point it to the installation script at: http://localhost/openemr/setup.php
- The first screen gives some general instructions and ensures file and directory permissions are set up correctly. Read and follow the instructions carefully. If there are errors on this screen, then follow instructions to fix. (screenshot below)
- Step 1 ask if you want OpenEMR to create the database. Read and follow the instructions carefully. (screenshot below)
- Step 2 is where you input MySQL database information along with OpenEMR user and OpenEMR path information. Do not be intimidated by this form. Most users will just need to enter a "Password", however, read and follow the detailed instructions carefully. (screenshot below)
- Step 3 configures OpenEMR. (screenshot below)

- Step 4 configures access controls (php-GACL). (screenshot below)
- Step 5 gives detailed instructions to configure PHP. Read and follow the instructions carefully. This information is personalized for your computer, so we suggest you print this screen for future reference. (screenshot below)
- Step 6 gives detailed instructions to configure Apache; it basically involves securing directories that will contain sensitive patient information. Read and follow the instructions carefully. This information is personalized for your computer, so we suggest you print this screen for future reference. (screenshot below)
- The final installation screen gives additional instructions. This information is personalized for your computer, so we suggest you print this screen for future reference. At the bottom of the page is your OpenEMR username and password, along with a link to OpenEMR. (screenshot below)
- Below is a screenshot of OpenEMR after installation. (screenshot below)
8. After installation is finished, then secure files (this should be done as root user):
- chmod 644 openemr/library/sqlconf.php
- chmod 644 openemr/interface/globals.php
- chmod 644 openemr/gacl/gacl.ini.php
- chmod 644 openemr/gacl/gacl.class.php
- chmod 600 openemr/acl_setup.php
- chmod 600 openemr/acl_upgrade.php
- chmod 600 openemr/sl_convert.php
- chmod 600 openemr/setup.php
- chmod 600 openemr/sql_upgrade.php
- chmod 600 openemr/gacl/setup.php
ALL DONE