Difference between revisions of "Install Translations"
From OpenEMR Project Wiki
Bradymiller (talk | contribs) |
Bradymiller (talk | contribs) |
||
| Line 20: | Line 20: | ||
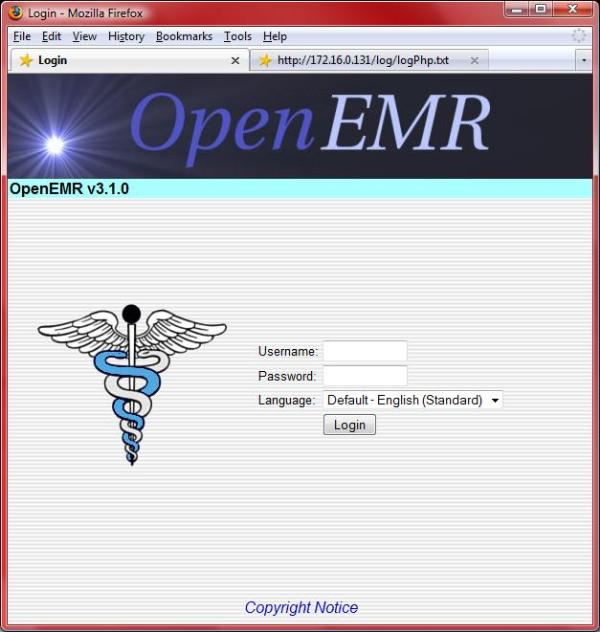
:Login. (screenshot below) | :Login. (screenshot below) | ||
[[File:Translations-Install-1.jpg|link=]] | |||
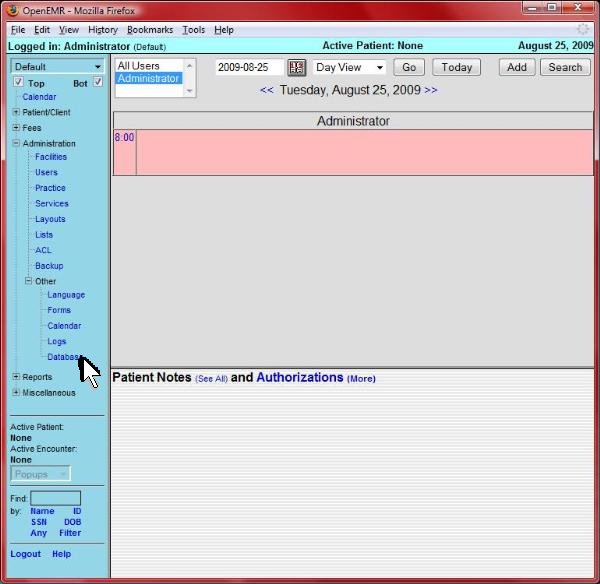
:Click 'Administration'->'Other'->'Database' from left tree menu. (screenshot below) | :Click 'Administration'->'Other'->'Database' from left tree menu. (screenshot below) | ||
[[File:Translations-Install-2.jpg|link=]] | |||
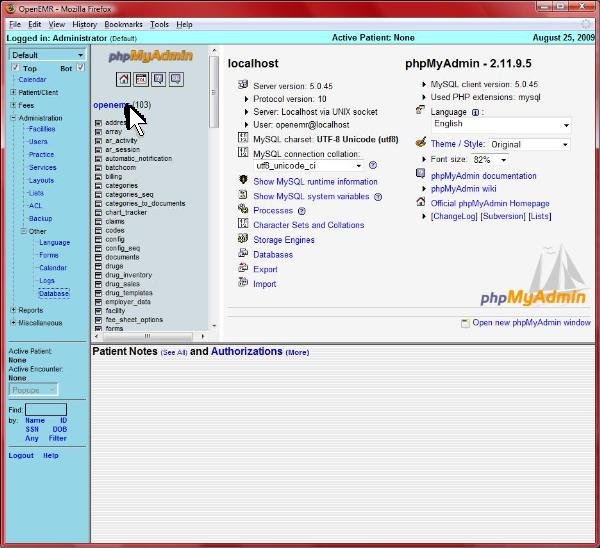
:Click 'openemr' database link near top left (highlighted by arrow). (screenshot below) | :Click 'openemr' database link near top left (highlighted by arrow). (screenshot below) | ||
[[File:Translations-Install-3.jpg|link=]] | |||
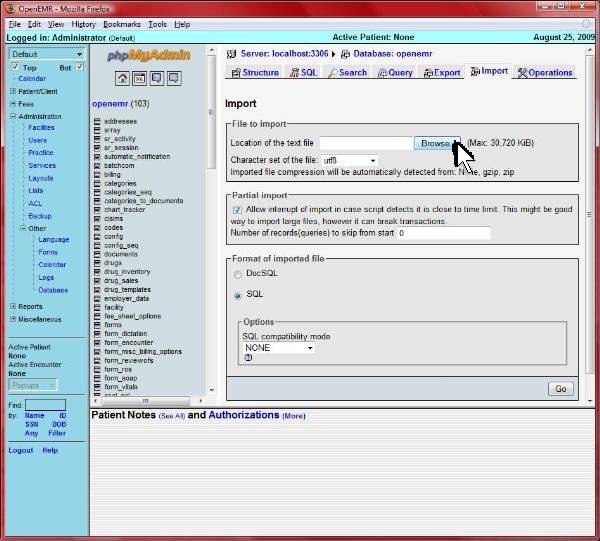
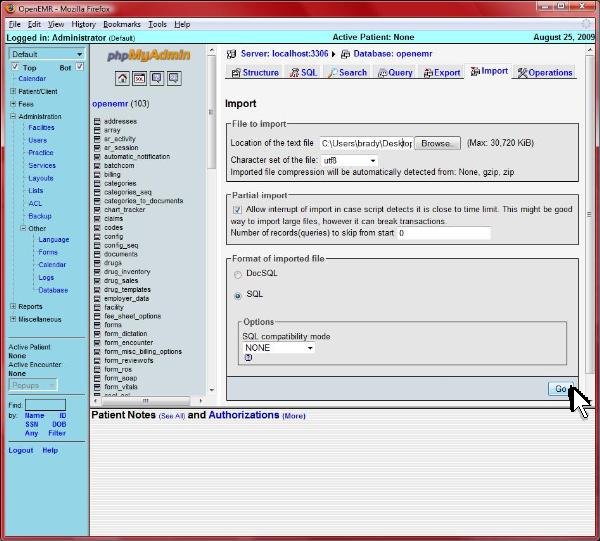
:Click 'Import' near top right (highlighted by arrow). (screenshot below) | :Click 'Import' near top right (highlighted by arrow). (screenshot below) | ||
[[File:Translations-Install-4.jpg|link=]] | |||
:Click 'Browse' (highlighted by arrow). (screenshot below) | :Click 'Browse' (highlighted by arrow). (screenshot below) | ||
[[File:Translations-Install-5.jpg|link=]] | |||
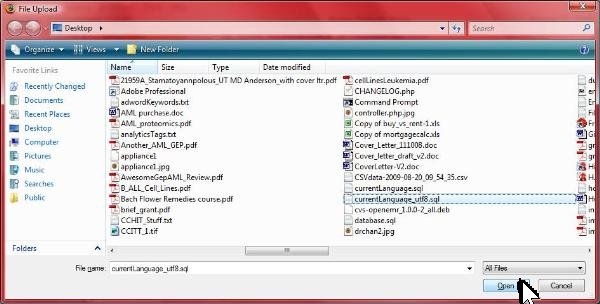
:Select the 'currentLanguage_utf8.sql' file that you downloaded in above first step, and click 'Open'. (screenshot below) | :Select the 'currentLanguage_utf8.sql' file that you downloaded in above first step, and click 'Open'. (screenshot below) | ||
[[File:Translations-Install-6.jpg|link=]] | |||
:Click 'Go' at bottom right (highlighted by arrow). After click, the import can take up to a minute or so. (screenshot below) | :Click 'Go' at bottom right (highlighted by arrow). After click, the import can take up to a minute or so. (screenshot below) | ||
[[File:Translations-Install-7.jpg|link=]] | |||
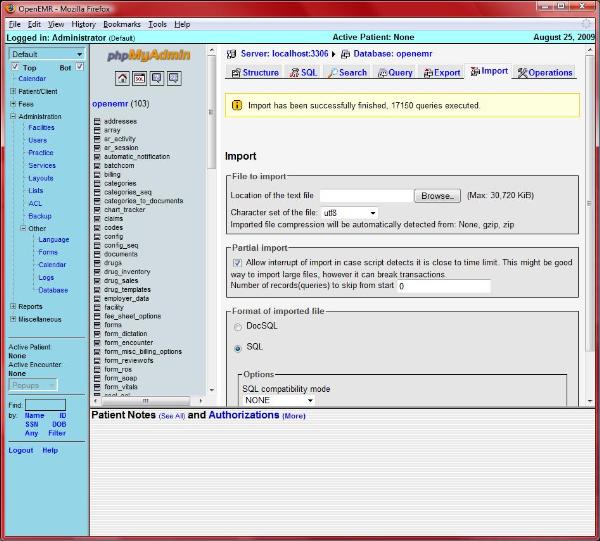
:After import is done, you should see the yellow banner stating the import has been successfully finished. (screenshot below) | :After import is done, you should see the yellow banner stating the import has been successfully finished. (screenshot below) | ||
[[File:Translations-Install-8.jpg|link=]] | |||
'''ALL DONE''' | '''ALL DONE''' | ||
Revision as of 04:09, 25 November 2009
Overview
These are instructions to upgrade to the most recent language translation tables published for OpenEMR. This is very simple to do.
- Note that this will delete all of your current local OpenEMR language translation tables.
Translation Releases
- 8/20/2009 Release: This was released with OpenEMR 3.1.0 and included only selected languages (English, English(Indian), Swedish,Spanish,Dutch,Chinese,Greek).
- 10/24/2009 Release: Includes all languages.
Installation instructions
1. Download the translation (choose a link above) release to desktop (via 'File'->'Save Page as'):
2. Login to OpenEMR:
- Login. (screenshot below)
- Click 'Administration'->'Other'->'Database' from left tree menu. (screenshot below)
- Click 'openemr' database link near top left (highlighted by arrow). (screenshot below)
- Click 'Import' near top right (highlighted by arrow). (screenshot below)

- Click 'Browse' (highlighted by arrow). (screenshot below)
- Select the 'currentLanguage_utf8.sql' file that you downloaded in above first step, and click 'Open'. (screenshot below)
- Click 'Go' at bottom right (highlighted by arrow). After click, the import can take up to a minute or so. (screenshot below)
- After import is done, you should see the yellow banner stating the import has been successfully finished. (screenshot below)
ALL DONE